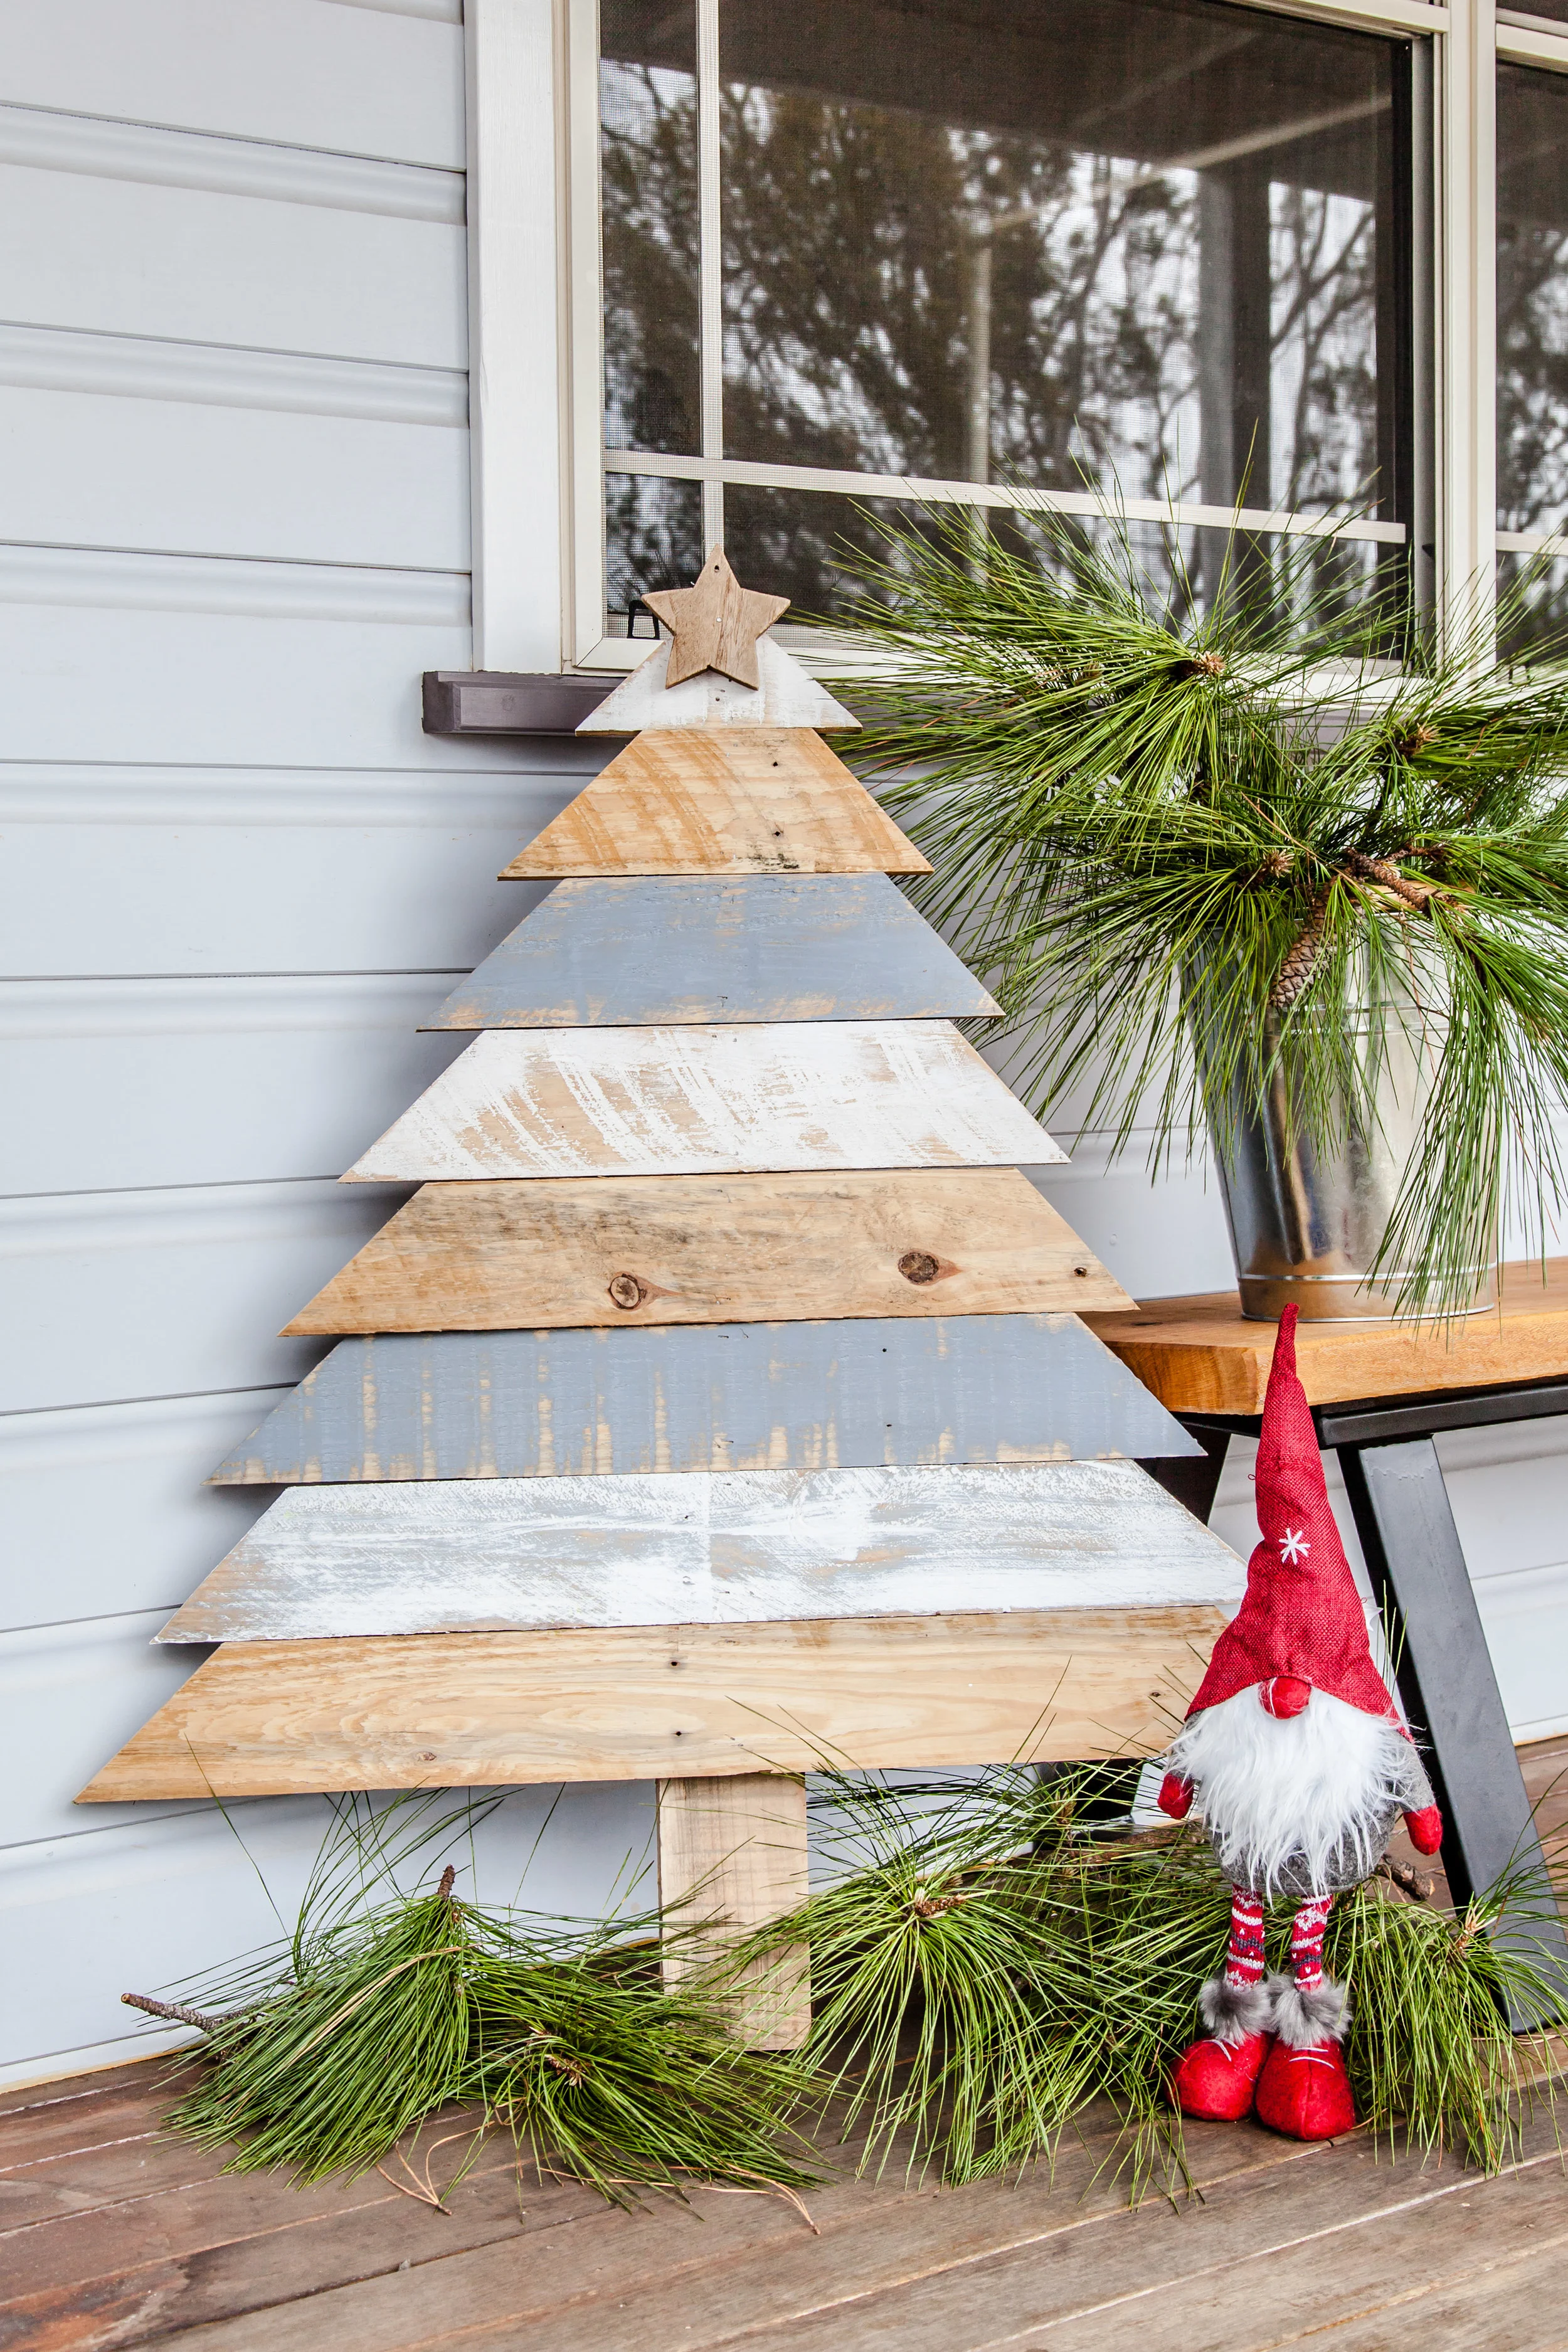
Rustic Pallet Christmas Tree + Video
Woot Woot, I hope you have had an awesome week guys because I’ve got another Christmas project to share with you today and my friend it is not a wreath. If you don’t know what I am talking about then go and check out my Advent Wreath project & Light-Up Snowman Wreath. Anyway back to today’s project!! I am showing you today how to make a Rustic Pallet Christmas Tree. It’s so dang cute and makes the perfect little thing to add beside your front door or positioned somewhere on your porch, deck or veranda. It’s not just for outside though it can be used inside too. Styled in a corner of your home or used as your main Christmas tree if you want to keeps things minimalistic and simple.

This Rustic Pallet Christmas Tree was extremely simple to make all you need is a little elbow grease at first to remove the planks of wood from the pallet. Lucky I have hubby to do the hard yards of pulling it apart. Once you have the planks removed from the pallet it’s simple enough after that. A few power tools are needed during the making of this tree but could be simplified with hand tools it just might take a little longer. Anyway let’s jump into how to make one for yourself shall we. If you are looking for a more in depth tutorial make sure you check out my video tutorial below the materials list for more information on how it gets put together!
Materials:
One - 1200mm x 1200mm untreated pine wooden pallet – Six 1200mm x 100mm x 20mm boards from the pallet.
Dulux - Vivid White sample pot
Dulux – Aerobus sample pot
Craft wooden star
Cutting List For Tree Branches:
6 x Boards from 1200mm x 1200mm Untreated Pine Wooden Pallet
Top of Tree - 195mm x 100mm x 20mm x 1
Second branch of tree - 300mm x 100mm x 20mm x 1
Third branch of tree - 390mm x 100mm x 20mm x 1
Fourth branch of tree - 480mm x 100mm x 20mm x 1
Fifth branch of tree - 570mm x 100mm x 20mm x 1
Sixth branch of tree - 660mm x 100mm x 20mm x 1
Seventh branch of tree - 750mm x 100mm x 20mm x 1
Eighth branch of tree - 840mm x 100mm x 20mm x 1
Backing Post
910mm x 100mm x 20mm x 1
Tools:
Crowbar
Hammer
Belt Sander & 120 grit sanding belts
Circular Drop Saw
Measuring Tape & Pencil
Paint Brush
Pneumatic Nail & Staple Gun
Detail Sander & 120 grit sandpaper
Unassemble & Prepare: Pry each board from the wooden pallet using a crow bar. Use the hammer to tap the nails out of each board in reverse to remove them easily. Lightly sand the fronts of each of the pallet boards with the Belt Sander using 120 grit sandpaper. The boards don’t need to be entirely smooth but enough not to give splinters when handling.


Measure & Cut: Measure & mark out each length for the Christmas tree branches. Trim each board to length using a circular drop saw. Cut the ends of each board on a 45-degree angle. Repeat this process with all branches of the tree. Measure and cut the backing board. You can find measurements for cutting the lengths of each board at the start of this post.


Paint & Distress: Lay the cut “branch” boards on a raised surface and paint varying boards using the Dulux Vivid White and Dulux Aerobus. I recommend leaving some planks timber for contrast against the painted ones. Check out which ones I painted and which ones I left plain. Once dry lightly distress each painted “branch” with a detailed sander using 120 grit sandpaper.


Assemble: Place the backing board on the ground and arrange the “branches” of the tree onto the board starting from the top of the tree to the bottom. Make sure each piece is centered on the backing board. Nail into the center of each board using the pneumatic nail gun using C-40mm Galvanised Brads to attach to the backing board. Predrill a hole into the wooden craft Christmas star through to the tree and nail into place.


Finish: Place the tree near your front door styled with pine tree foliage and Christmas paraphernalia for a true festive entry.
So there you have it guys. My Rustic Pallet Christmas Tree from start to finish. Don’t forget to check out my video tutorial at the top of the post if you need some live action on how we created this tree. I have it sitting on my front porch beside my door currently. We in the process of revamping our front porch so I know it will look even better next year when I can add a few more touches with it.
My friend Ange kindly donated her front veranda for the images you see on this blog post because ours is looking less than perfect for after pics.